Friday, February 26, 2010

Kitchen Refresh part 2

So after aligning all the doors and putting the drawer fronts on we had to find some hardware that we liked. We really wanted the boomerang drawer pulls from Rejuvenation but they were back ordered. We actually waited a month or so to see if more would come in but that didn't happen. So we opted for our second choice, which was the satin dish knobs with the back plates. We love them!


The next phase of our kitchen refresh consisted of two parts. The first would be a new sink and a garbage disposal.This was a very welcomed addition. The hardest part of this install was the electrical. We were tempted to just put the on/off switch under the counter, but my dad and I were feeling ambitious and decided to mount it in the wall. Since we were running wires through the wall we decided to install another receptacle. We also mounted some under cabinet lighting and yet another receptacle at the end of the counter.


The second part was to install an over the range microwave. Our current microwave took up too much counter space and there was not a great place to put it without the door opening being awkward. Sadly this meant we had to remove the Nutone fan above our range. At first we mounted the microwave without venting it to see how well it would do with just circulating the air. This was a waste of time because you might as well not be using the fan it worked so poorly. So back down the microwave came and we spent 2 days cutting holes and routing new duct work into the existing duct work from the Nutone vent. Sadly once we got everything back together the vent was not lined up right and we had to take the microwave down again. I think we did this 5 or 6 times before we eventually got it right. Now we have tons more counter space and the kitchen looks so much better.


The next part of our kitchen refresh will be a gas range. The current oven works horribly and looks like crap now compared to the fridge and microwave. This is will a big undertaking though since we have to run lines for the gas and we have to cut up the cabinets to get a modern range to fit. We also plan to remove the horrible wood trim along the counter edges since it does not go with our current look.

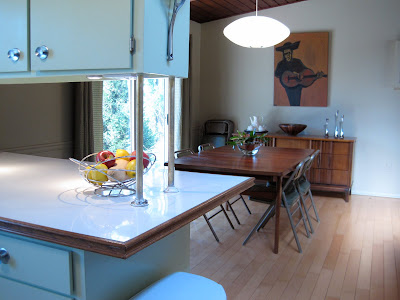
Here are a few additional pics of the kitchen that I liked and wanted to share.


Be seeing you.

Friday, February 12, 2010

SNOWPOCALYPSE!!!

This is nothing like the rest of the East Coast but it's Atlanta and it rarely snows here. Enjoy our first winter in Northcrest.


Our neighbor's house looked really good.


Our mini snowmen are here to welcome you into our house.


Monday, February 1, 2010

Kitchen Refresh part 1

So even before we purchased the house we knew the kitchen would have to change. I know some people would call this blasphemy since it was the original kitchen. Oh well! It was time for a change!


The first day I was in the house I took the cabinet doors off. So our kitchen looked like this for a month or so before we actually got to work. In this picture you can see how we filled in the old cabinet hinge holes because we were using a different style hinge.


Once the holes were filled I got to sanding all the layers of paint off. You can't see it but I am wearing a mask due to the likelihood of lead paint. We also laid out plastic drop clothes everywhere to help with clean up later. The sanding process was a huge pain and my original plan of going all the way down to wood did not happen. I decided that sanding it till smooth was good enough.


Here you can see how things ended up before we started painting.


The two things we wanted to change about the kitchen were the doors and color. Since we couldn't afford to buy all new custom doors my Dad suggested that we buy some nice plywood and make our own. That idea worked out great because we wanted simple flat doors and it only cost $100 for the wood. Of course Susan thought this idea was crazy and the kitchen would never be finished. Luckily she was wrong. This is my dad painting the doors in his shop. One thing to note is that we put on a wood veneer binding along the edges to give the doors a more finished look. That was my Dad's idea and I am glad he suggested it. My Vespa was kind enough to provide the quality control during the painting process.


The color we ended up using was pistachio color and it looks much better in person than it does in the pictures. Also, our kitchen is usually not this messy.


There were some alignment issues when we first hung the doors but that was quickly fixed.


Now the next hurdle was to decide what knobs to use...